To get in on the festivities in style, it’s useful to know how to make one yourself with your own two hands. And it doesn’t have to be expensive or difficult. You can make several of them for around $60 depending on where you source your flowers.
Give it a try below.
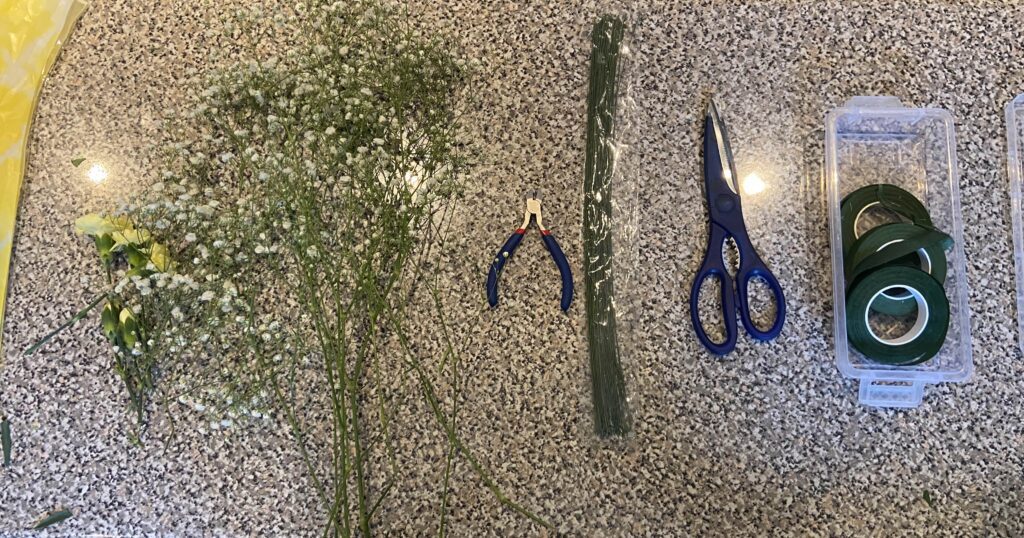
Materials needed:
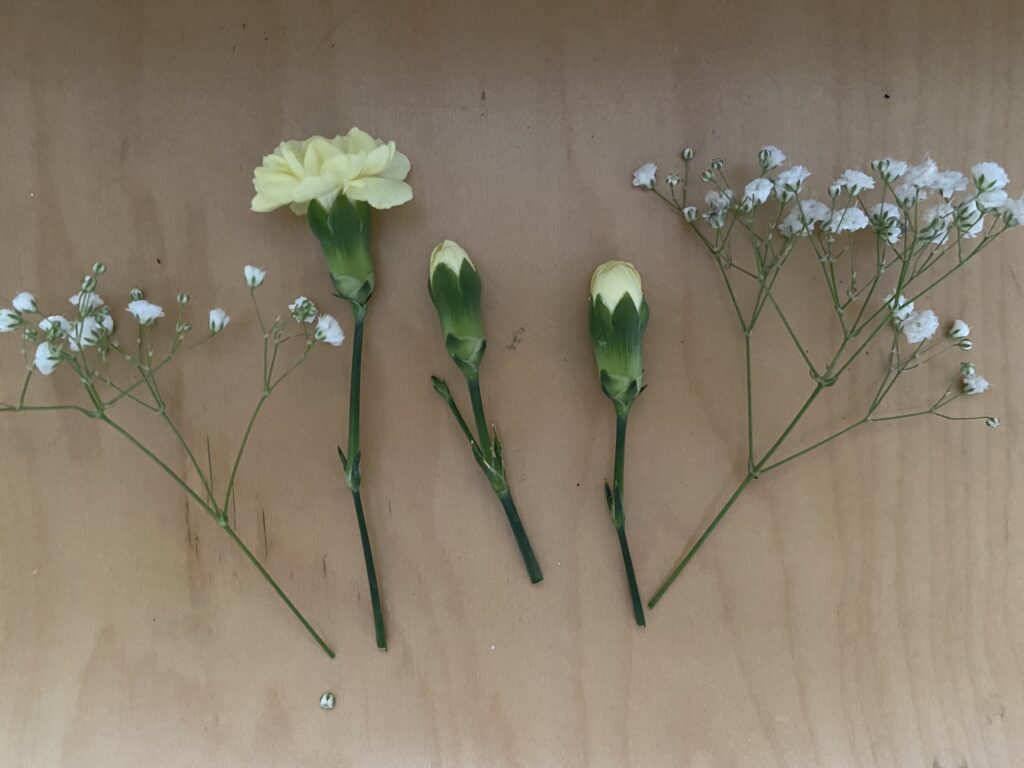
-A generous collection of flowers. You can pick these from your own garden, purchase a bouquet from the grocery store, or collect artificial flowers. These can be any type of flower you like best, or multiple kinds. The style of the crown is completely up to you.
However, it’s important that each flower piece has long enough stem material to be attached to the crown’s wire headpiece. About two centimetres of stem length is sufficient. You may also find that the crown looks best when the pieces are full-looking, with many blooms.
-Florist wire. This is the framework of the crown, the headpiece. You can find it in craft stores or online, and is sold in rolls or pre-cut lengths. In this tutorial, two pieces of florist wire were used for one crown. Alternatively, you can use a spool of wire and cut your material from the spool.
-Floral tape. This tape will adhere all of the flower pieces to the wire.
-A pair of scissors, to cut the floral tape.
-(Optional) a pair of pliers. If you don’t have pre-cut florist wire, these will help you cut the wire to the size of the crown user’s head.
How to make the crown:
First, take the florist wire and measure how much you will need to fit around the user’s head, either yourself or someone else. You want the crown to rest comfortably from your forehead to the back of your head. Not too snug of a fit and not too loose, either—just right.
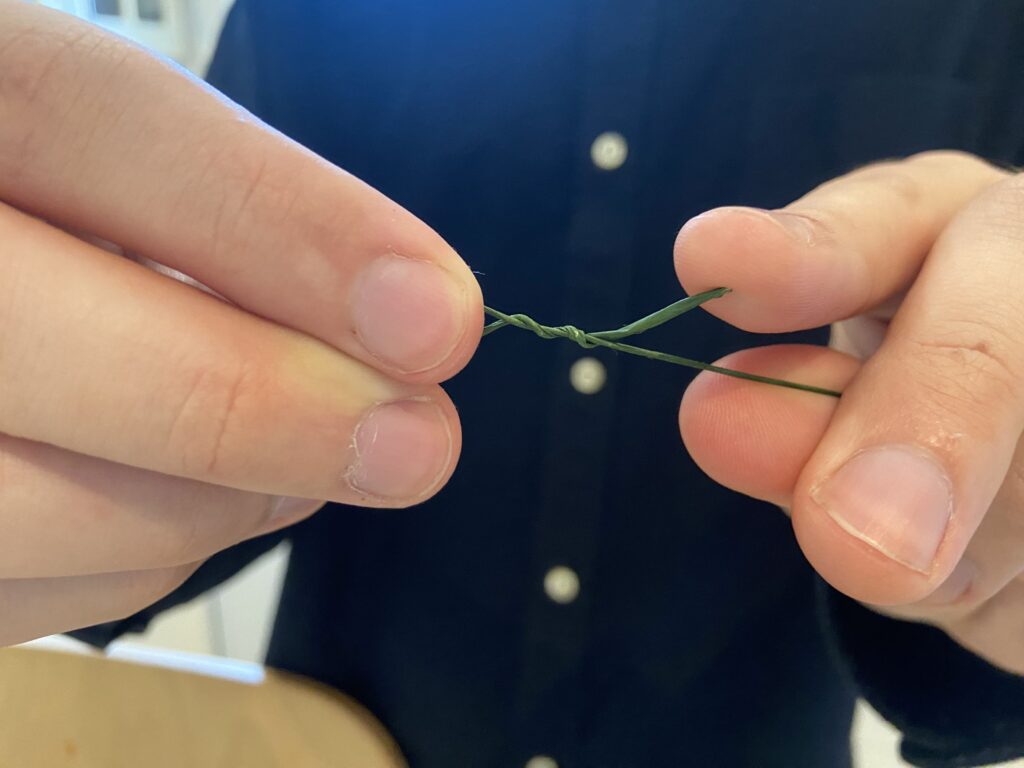
When you have measured an adequate amount of wire, either cut the wire from the spool or take pieces/a piece of the florist wire and tightly wrap the ends around each other so that the wire ends overlap each other.
Next, take your flowers out (in this tutorial, baby's-breath and carnations were used) and use scissors to snip off small pieces that you can arrange around the wire of the crown. Trim them further if the stems are still too long or have pointy offshoots in the way. Put these to the side so it’s easy to assemble the crown.
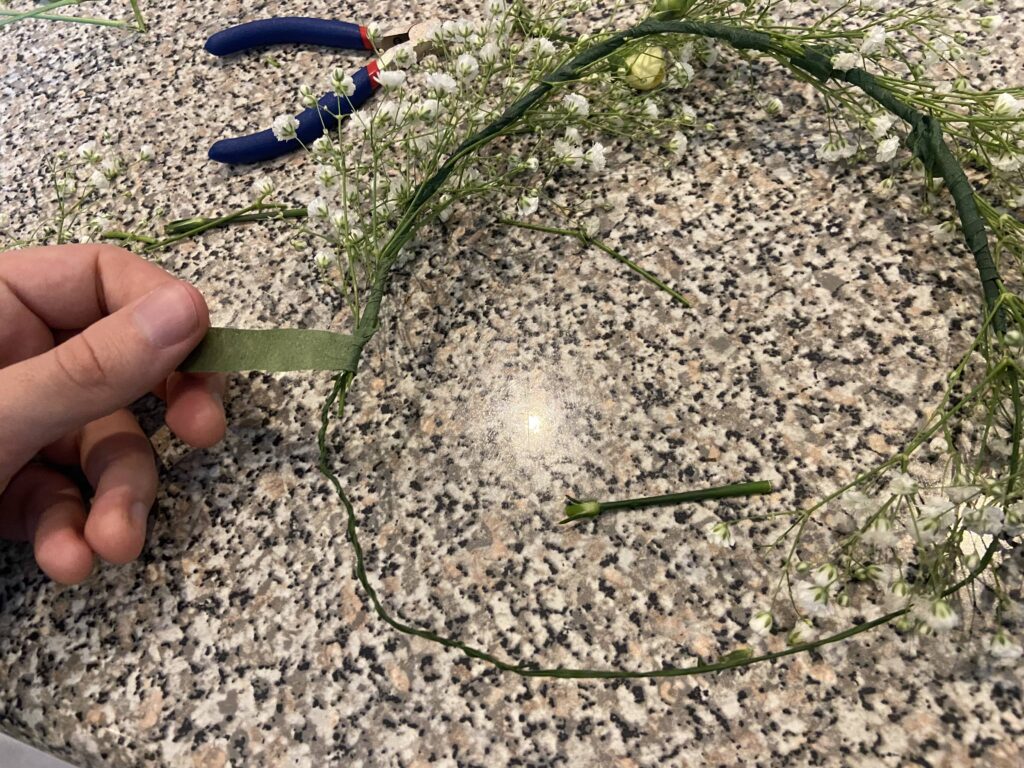
To attach the flower pieces to the wire, you’ll need to lay one side of a flower piece flat against the wire. Cut off about 10 centimetres of floral tape and wrap the tape tightly around the stem, one piece at a time. Pull the tape out tight as it goes around each flower stem, almost like you’re tying shoelaces. The thicker the flower piece, the tighter the tape will have to be. You’ll notice that the tape starts to get stickier once you pull at it.

The protruding heads of the flower pieces should face the same right hand-side all the way around the wire ring. It takes a little while to finish the crown this way, but keep each piece quite close to the edge of the last one, so the crown is full and abundant all the way around.
You may want to tape on less bulky flowers for the most part, but then tape on a bigger, more colourful flower once in a while. This creates a satisfying contrast throughout the crown. Keep adding flower pieces until they start to fit underneath the first flower’s blooms. Before long, the flower crown will look full and complete.
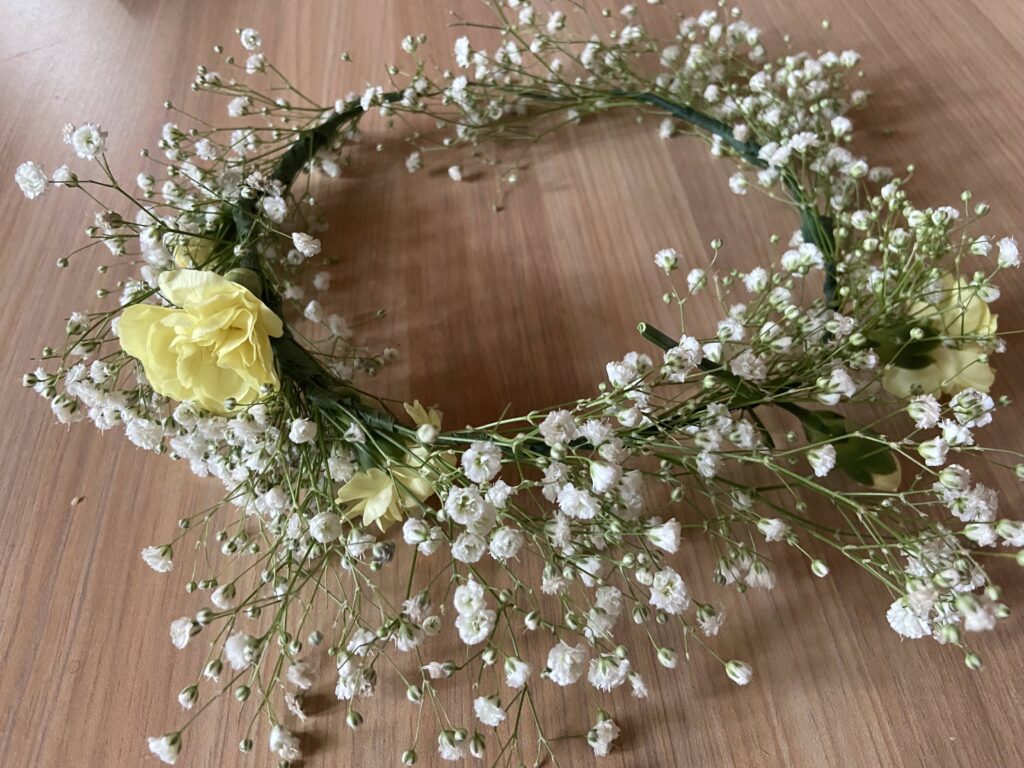
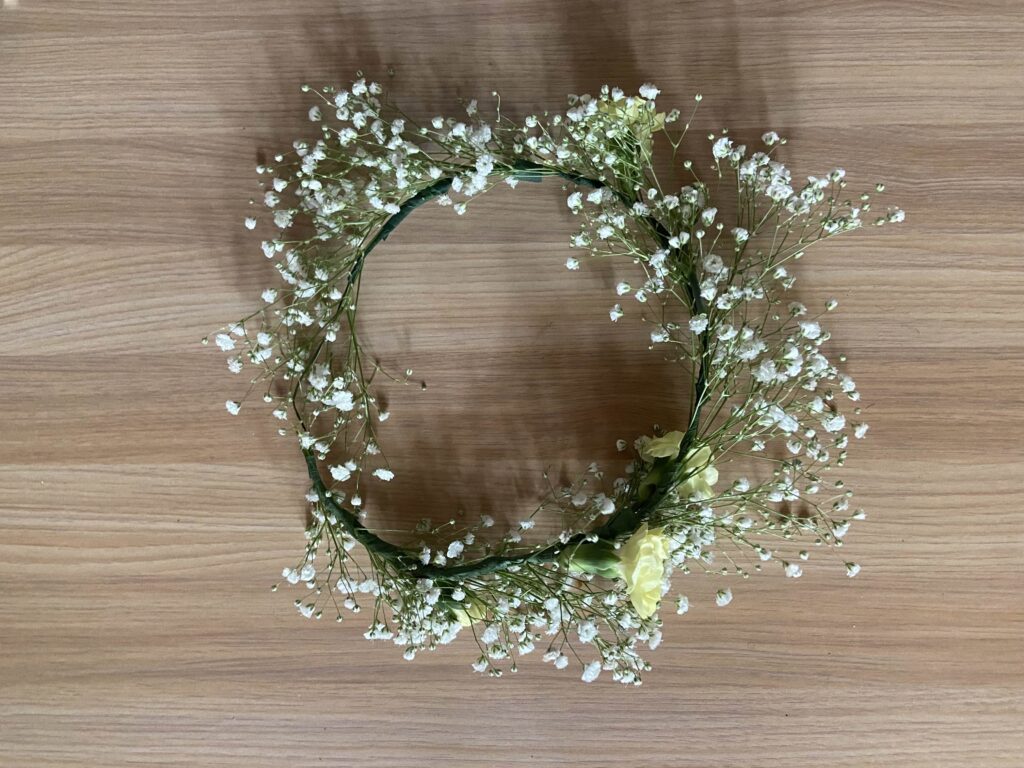
And there you have it—a beautiful flower crown ready for summer festivities! It’s recommended to make them as soon before the time you are due to wear them as possible, so the flowers don’t wilt or fall off.
Still, if you use fresh flowers and these dry out, don’t throw out the crown! Once you take off the old flowers and tape, you can use the metal frame again, in a totally different style or with different flowers if you wish.
Ilusat jaanipäeva kõigile!